
To start with choose a decent sized box and fold the top and side flaps back.


The third stage is to cut out both sides and their corresponding flaps.
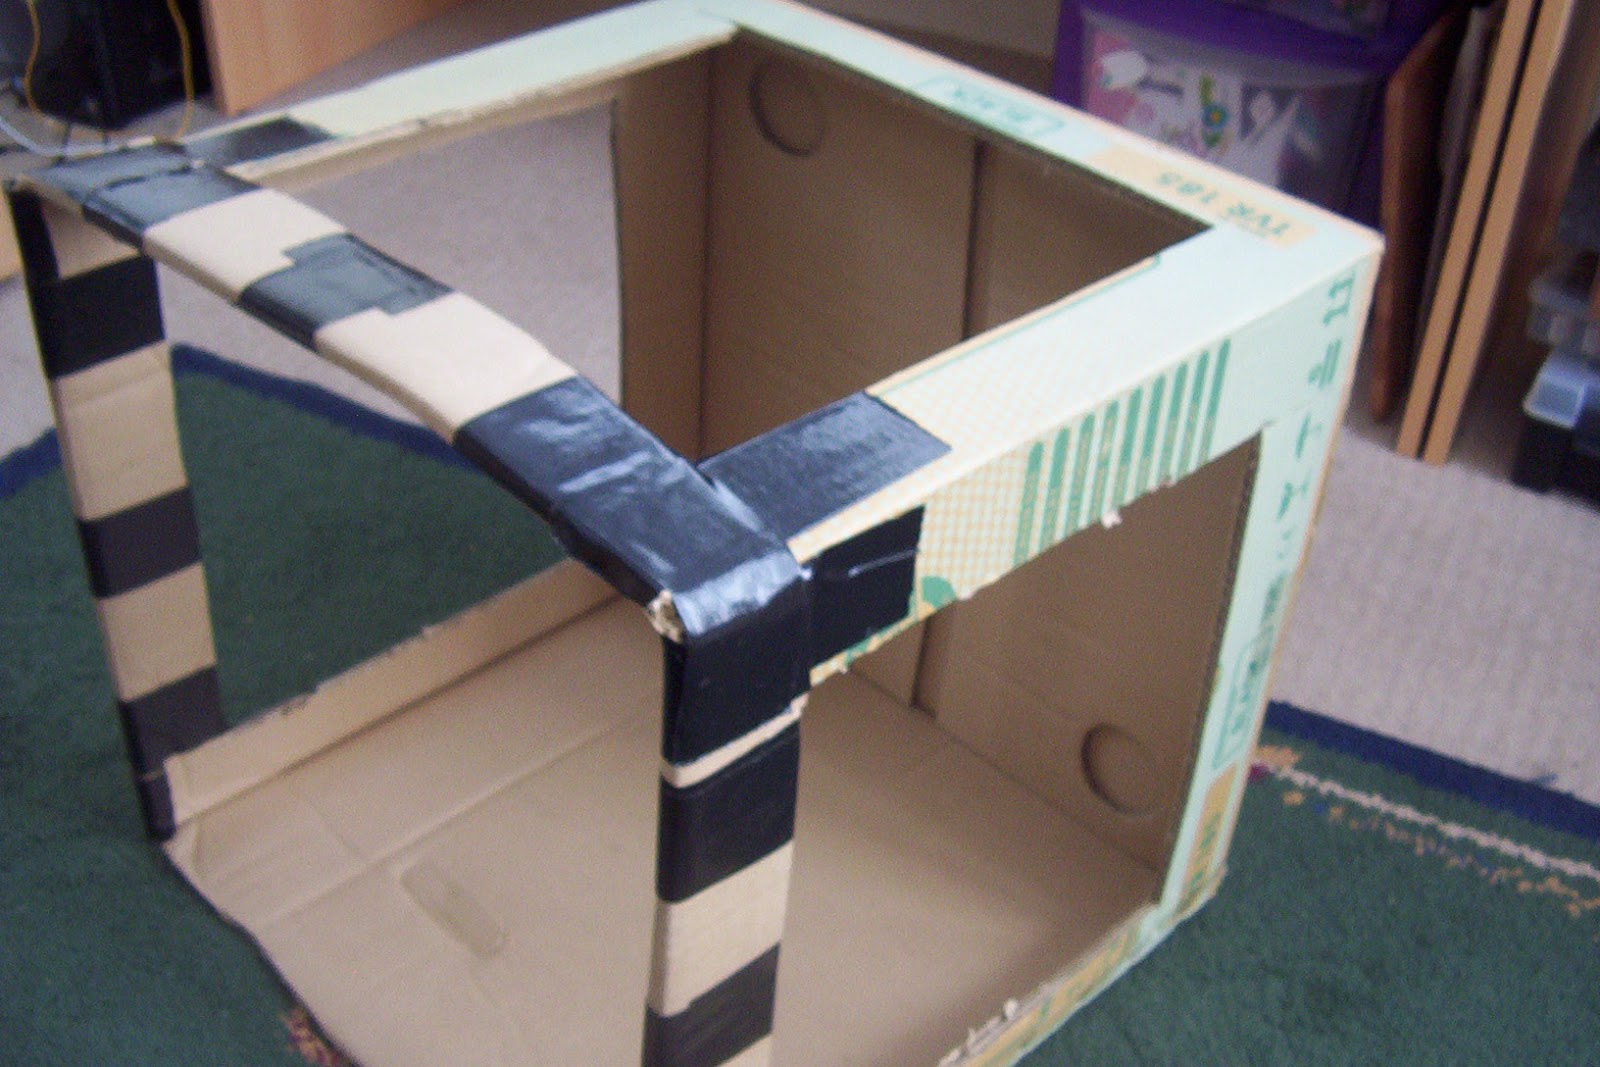
Fourth stage is to tape the flaps to the frame of the box.

Stage five is to line the back panel with white paper and secure with clear tape.

Stage six is to fit the backdrop. As you can see the paper is wider than the top hole of the box so to make it fit you can cut a couple of slits either side and feed the paper through.
Once you are happy secure it with clear tape at the top of the box and underneath the bottom of the box, there is no need to tape the sides.

Stage seven is to fit some tracing paper around the box covering the side across the top and down the other side.
I used some draughtsman paper bought from a local art dealer. Any tracing paper will suffice, it helps to diffuse the light evenly inside the box.
Secure the tracing paper with clear tape all around it's edges.
 All you need now is some light, I use a lamp with daylight bulbs on either side, and your ready to take some pictures.
Okay, now I think I will actually build one myself, are the 2 Lights from the sides enough or should I add one from above?
ReplyDeleteThanks for the Great How-To!
I use one from above also but due to the height on this box I doubt if it makes any difference. I'm thinking about altering the box, it doesn't need to be that high. It's for photos of dwarfs after all.
ReplyDelete